Showing posts with label cmd. Show all posts

Wednesday, 1 June 2016

Wi-fi hacking is not a big deal – Crack WPA2 Password in 5 steps !!!


Requirements:

  1. Wireless card (support promiscuous mode) 
  2. Access point with WPA2 and WPS enables 
  3. Linux installed PC(ubuntu,kali,mint,etc). 

STEP 1:Open our terminal (CTRL+ALT+T) and type airmon-ng (view tips and tricks how to create keyboard shortcut on kali linux)
this command will lists our wireless card that attached with our system.

STEP 2: The next step we need to stop our wireless monitor mode by running airmon-ng stop wlan0

STEP 3: Now we ready to capture the wireless traffic around us. By running airodump-ng wlan0 our wireless interface will start capturing the data.


From the picture above, we can see many available access point with all the information. In the green box is our victim access point which is my own access point

REFERENCE

  • BSSID (Basic Service Set Identification): the MAC address of access point.
  • PWR: Signal level reported by the card. 
  • Beacons: Number of announcements packets sent by the AP .
  • #Data: Number of captured data packets (if WEP, unique IV count), including data broadcast packets. 
  • #/s: Number of data packets per second measure over the last 10 seconds. 
  • CH: Channel number (taken from beacon packets). 
  • MB: Maximum speed supported by the AP. If MB = 11, it's 802.11b, if MB = 22 it's 802.11b+ and higher rates are 802.11g. 
  • ENC: Encryption algorithm in use. 
  • CIPHER: The cipher detected. TKIP is typically used with WPA and CCMP is typically used with WPA2. 
  • AUTH: The authentication protocol used. 
  • ESSID: Shows the wireless network name. The so-called “SSID”, which can be empty if SSID hiding is activated. 

STEP 4
: From the step 3 above, we can find access point with encryption algorithm WPA2 and note the AP channel number. Now we will find out whether target AP has WPS enabled or not wash -i wlan0 -c 8 -C -s

If the WPS Locked status is No, then we ready to crack and move to step 5.

STEP 5: The last step is cracking the WPA2 password using reaver.
reaver -i <your_interface> -b <wi-fi victim MAC address> –fail-wait=360

Because we already get the information from step 3 above, so my command look like this:
reaver -i wlan0 -b E0:05:C5:5A:26:94 –fail-wait=360.


it took about 5 hours to crack 19 characters WPA2 password from my Kali virtualBox, but it depend with our hardware and wireless card.

How professionals access task manager in windows OS ? !!!!

Task Manager shows you the programs, processes, and services that are currently running on your computer. You can use Task Manager to monitor your computer’s performance or to close a program that is not responding.


If you are connected to a network, you can also use Task Manager to view network status and see how your network is functioning. If more than one user is connected to your computer, you can see who is connected, what they are working on, and you can send them a message.


Way 1: Open the app through taskbar.
Right-click blank area on the taskbar, and choose Task Manager in the context menu.

Way 2: Turn on Task Manager from Quick Access Menu.
Right-tap the lower-left corner to open the menu, and then select Task Manager on it.


Way 3: Open Task Manager in Start Menu.
Step 1: Tap the bottom-left Start button and choose All Apps in the menu.


Step 2: Open the Windows System folder.


Step 3: Click Task Manager to open it.


Way 4: Open this program in Control Panel.
Step 1: Enter Control Panel.
Step 2: Input task manager in the upper-right search box, and tap Task Manager in the results.

Way 5: Start Task Manager via Run.
Press Windows+R to open Run dialog, enter taskmgr and tap OK.
Way 6: Open the program from Search panel.
Step 1: Press Windows+C to open Charms Menu, and choose Search on it.
Step 2: Enter task and click Task Manager.
Tip: There are two options named Task Manager on the Search Panel, and you can choose either of them.
Way 7: Access Task Manager with the help of Command Prompt.
Step 1: Click the Start button, enter cmd in the empty box and tap Command Prompt.
Step 2: Type taskmgr and press Enter.
Way 8: Open it through Windows PowerShell.
Step 1: Tap the Search button on the taskbar, type windows powershell and click Windows PowerShell to enter it.
Step 2: Input taskmgr and hit Enter.
Way 9: Open Task Manager from Ctrl+Alt+Del options.
Press Ctrl+Alt+Del and choose Task Manager from the choices.

Tuesday, 31 May 2016

Hide hard disk or partition inside windows(XP/VISTA/7/8/8.1/10) without using any software or application

note:You should first sign in using an administrative account for              doing this.


STEP 1: Press window key + R or select Run from start menu                   to launch the Run window.


STEP 2: Type in diskmgmt.msc and press enter key/ok button.

   
   STEP 3 : The disk management windows opens.

 STEP 4 : Right click on the partition/local disk to be hidden                      and select change drive letter and paths


STEP 5 : On the pop-up windows click remove button and then                 click ok 


   Now u can see that no label is displayed on your drive.


  The drive will not be visible in windows explorer ,this PC/My    computer etc. This is the safest way of hiding a whole    partition/local disk since there is no data loss or fragmentation  in this method.

The partition can be made visible by following steps 1 to 4 and then in the pop-up windows click add . Then click ok in the new popup window.


Now you can see that the drive letter or label reappears.


The partition will reappear in  explorer, my computer etc.


Saturday, 28 May 2016

Clean and boost your PC/laptop in any Windows PC without using any software or applications

Clean and boost your PC/laptop in any Windows PC  with Disk Cleanup


During the normal use of your computer, you will accumulate a number of unnecessary files (temporary setup / internet files, recycle bin, etc.). You can remove these files with the built-in Disk Cleanup (cleanmgr.exe) utility inside of Windows . When it comes to computer repair, I use it all the time on my clients systems. And it can be run a couple of different ways and withdifferent options.

Running Disk Cleanup on demand

There are a couple of different ways to run Disk Cleanup on demand. The following procedure cleans up files associated with your user account. You can also use Disk Cleanup to clean up all the files on your computer.
Windows 8 Disk Cleanup dialog box with standard options
  1. On the Start menuswipe in from the right side of the screen or press the Windows logo key Windows logo key + C to bring up the Charm bar.
  2. Left-click on Settings button in Charm Bar.
  3. Left-click on Tiles in Settings.
  4. Drag the Show/hide administrative tools slider to the Yesposition.
  5. Left-click on background of the Start menu, making the Charm bar disappear.
  6. Once the administrative tools appear, left-click on Disk Cleanup.
or
  1. Swipe in from the right-side of the screen or press the Windows logo key Windows logo key + C to bring up the Charm bar.
  2. Left-click on Search button in Charm Bar.
  3. Left-click on Apps in Search.
  4. Type Disk Cleanup in the Search field on the Search pane.
  5. In the results on the left hand side, left-click on Disk Cleanup.
After you select the drive you want to clean, Disk Cleanup scans it for possible files to delete. It then allows you to select which files to delete. When you click the Clean up system files button it restarts with a More Options tab. This tab includes two additional ways to free even more disk space:
Windows 8 Disk Cleanup dialog box with more options
  • Programs and Features. This option opens Programs and Features in Control Panel, where you can uninstall programs that you no longer use. The Size column in Programs and Features shows how much disk space each program uses.
  • System Restore and Shadow Copies. With this option, you can delete all but the most recent restore point on the disk.
    System Restore uses restore points to return your system files to an earlier point in time. If your computer is running normally, you can save disk space by deleting the earlier restore points.
    In some editions of Windows 8, restore points can include previous versions of files, known as shadow copies, and backup images created with Windows Complete PC Backup. These files and images will also be deleted.

Running Disk Cleanup with predefined options

You can also run Disk Cleanup from a command prompt. This gives you the option of predefined settings for running Disk Cleanup as scheduled task in Task Scheduler or a shortcut on your Desktop or Start menu. Click here for more information on how to open a Command Prompt with Administrator privileges in Windows 8.
Windows 8 Disk Cleanup run at a command prompt with sageset option
Windows 8 Disk Cleanup run at a Command Prompt with sageset option
You can start the Disk Cleanup tool by running cleanmgr.exeDisk Cleanup supports the following command-line switches:
  • cleanmgr /d driveletter: - This switch selects the drive that you want Disk Cleanup to clean. Note that the /d switch is not used with /sagerun:n.
  • cleanmgr /sageset:n - This switch displays the Disk Cleanup Settings dialog box and creates a registry key to store the settings you select. The n value is stored in the registry and allows you to specify different tasks for Disk Cleanup to run. The n value can be any integer value from 0 to 65535. To get all the available options when you are using the /sageset switch, you may need to specify the drive letter that contains the Windows installation.
  • cleanmgr /sagerun:n - This switch runs the specified tasks that are assigned to the n value by using the /sageset switch. All drives in the computer will be enumerated, and the selected profile will be run against each drive.
To run Disk Cleanup with the /sagerun:n switch in Task Scheduler or in a Desktop or Start menu shortcut, you would use something similar to the following:
C:\Windows\System32\cleanmgr.exe /sagerun:n

15 Awesome Windows Run Commands You Might Not Know About

15 Awesome Windows Run Commands You Might Not Know About


The everyday Windows user believes that both command prompt, and the Run dialog box is meant for geeks and nerds. Well, without doubt using them sure gives a vibe that you fall in the higher IQ pool, but they really aren’t all about codes and the geekiness that the average user tends to associate them with. There are many ways a normal user could use them, especially the Run box, to speed up things and that’s exactly what this post is all about.
We will show you 15 awesome Run commands that’d help you bypass a series of clicks, thereby making things faster in your daily usage of Windows. Do note that the Run hasn’t disappeared in 
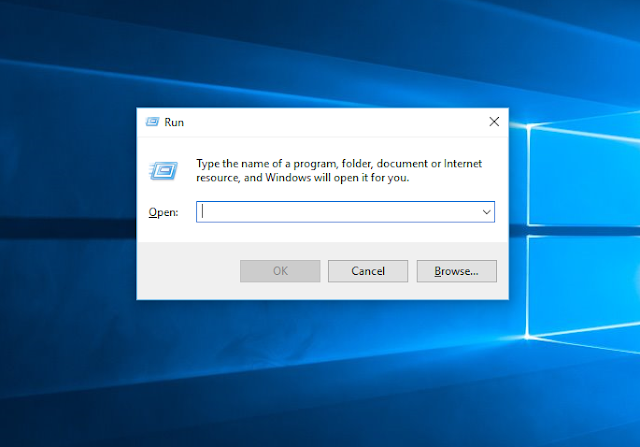
Windows  10 either. It might not show up like it did in its predecessors, but a simple Win+R keystroke would bring it up. Hence knowing how to use it is only going to help you.
run command
I think it’s safe to assume that almost all of you have used the Run box at least once to open up tools quickly that are embedded deep into the system. Commands like Calc, Regedit, winword, notepad, etc. are pretty famous among the masses, and they are definitely helpful at times. We are going to go a bit beyond these very general commands today and share the ones that you probably don’t know about.
Note: Again, to run these commands, press Win+R button to open the Run box, type in the command you want to run and press the enter key.
Let’s begin ladies and gentlemen.

1. %programfiles%

We have to open program files most of the time to run and manage installed applications. This command will open your Program Files folder directly no matter on which drive Windows is installed on your computer. It’s better than opening Windows Explorer and then navigating to the folder manually.

2. %userprofile%

Just like the previous command, this will open up the user profile directory for the particular user. You can access your picture, music, videos and other personal folders easily from here.

3. control

If you want to open your system Control Panel, this command will open it up for you directly. You’ll be surprised how few people know this one. So many of my so called geeky friends had no notion about this one.
We will be seeing how to open certain Control Panel settings directly as we proceed.
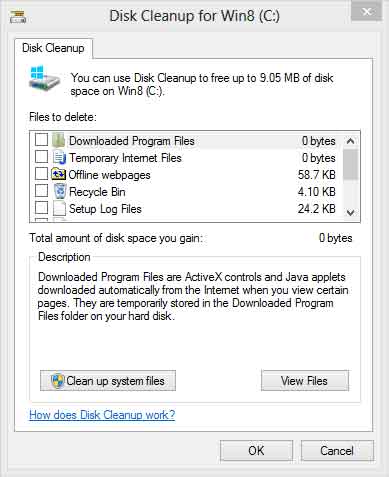
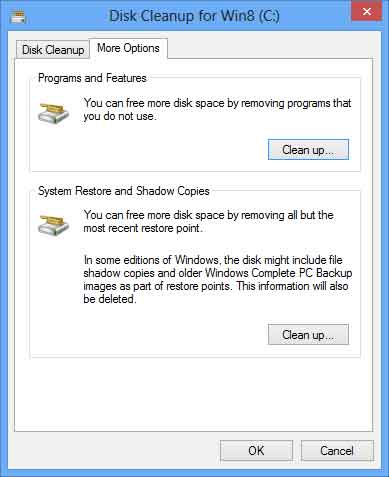
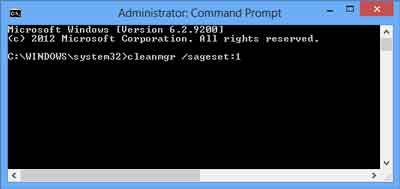
4. cleanmgr

disk cleanup
Probably, the easiest way to clean up the junk files accumulated in your computer. Run the command to open up the Windows Disk Cleanup Manager, select the drive you want to clean and click ok. Computer will then scan the particular drive for junk files and give the option to clean them.

5. compmgmt.msc

The command will open Computer Management, directly which you open conventionally by right-clicking on My Computer (or Computer), and selecting Manage. One can manage shared folders, manage disk services and take care of other management stuff using that window.

6. firewall.cpl

Want to disable or enable firewall quickly? Type in firewall.cpl in the Run box and press enter. Takes you right into Windows Firewall.

7. fsmgmt.msc

shared folder
Keep track of all the shared folder and devices using this command. You can control sharing on your computer easily from here.

8. Open Web Browser (iexplore, chrome, firefox, opera)

These commands will open up Internet Explorer, Chrome, Firefox, and Opera on your system respectively if they are installed on your computer. That’s not all. You can append the URL of the website at the end of the browser name to open the website directly. For e.g. if you want to open Guiding Tech on Chrome, open Run Command and type in Chrome www.guidingtech.com and press enter. For the note, this command is my personal favorite (no points for guessing why).

9. msinfo32

system informaition
Probably, the easiest way to see your computer’s complete system info. Here you can find all the hardware and software information you will need to know about your computer.

10. Netplwiz

user sccount
This command is useful for a multi-user computer. Administrators can directly open User Account advance configuration and configure any account they would like. Other users, however, can edit and change their personal account preferences.

11. osk

on screen keyboard
Abbreviation for On Screen Keyboard, this one opens it on your computer screen. You can use these on screen keyboards to fight keyloggers while browsing through a shared public computer.

12. Logoff/shutdown

As the name speaks, these commands quickly logoff a user or shut down the computer respectively. You can also use “shutdown –a” to abort a system shutdown, but you have to be very quick while using the command.

13. utilman

We have seen how osk can open the on screen keyboard Windows utility, but if you want to use magnifier or a narrator, this command will open up the full utility manager for you.

14. wuapp

windows update
This command will open up the Windows Update Manager for you. You can then install and configure your Windows updates from here.

15. write

Last but not the least. Just as the notepad command is used to open Windows Notepad, write launches the default Windows WordPad. Oh, you never knew this existed, did you? Try it out.

Conclusion

Those were few of my favorite Run commands out of hundreds of them. Now, we are counting on you, our intelligent readers to expand the list. Come on, chip in with some of the cool Run commands you’ve been using all this time. Drop a comment!